Advanced Linux User and Group Management: Hands-on Approach


User and group management in Linux involves creating, modifying, and deleting users and groups, assigning them appropriate permissions, and controlling access to files and resources. This is typically achieved using command-line tools such as useradd, usermod, userdel, groupadd, groupmod, and groupdel. Here's an overview of these commands and their usage:
User and Group Management Tools:
passwd: Change user passwords.id: Display user and group information.groups: Display groups a user belongs to.chown: Change file owner and group.chgrp: Change group ownership of files.su/sudo: Switch user or execute commands with superuser privileges.
User & Group Management:
User account management in Linux typically involves commands like useradd, usermod, groupadd, and others. I'll walk you through creating a user account, creating a group, adding users to groups, and modifying user account attributes.
Creating a User Account with
useradd:To create a new user account, you can use the
useraddcommand. For example, to create a user named "nahid," you would run:sudo useradd nahidThis creates a new user account with the default settings.

Viewing User Information:
To view user account details, you can use the
idcommand. For example, to check the user that "nahid" belongs to:id nahid # getnet nahid
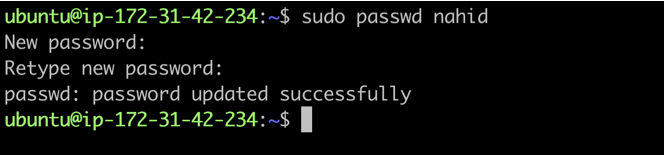
Setting a Password for the New User with
passwd:After creating the user, set a password for the user with the
passwdcommand:sudo passwd nahidYou'll be prompted to enter and confirm the password for the new user.
Modifying Users (
usermod):sudo usermod [OPTIONS] usernameModify attributes of an existing user (
username).Options can include changing the username, home directory, shell, etc.
Common Options:
Change Username (-l):
sudo usermod -l new_username old_username
Change the username from
old_usernametonew_username.Here, we have created a new user named 'test-1.' Now, let's see what options are available to modify the 'test-1' user using the following command.
sudo usermod test-1

Now, we'll use a command to change the username. Initially, our current username was 'test-1,' and we'll modify it to 'test-2.'
sudo usermod -l new_username old_usernamesudo usermod -l test-2 test-1

To check if the user has been modified, we executed the 'id test-1' command and found that the 'test-1' user doesn't exist anymore. Next, we ran the 'id test-2' command and noticed that the user's group ID and groups remained the same, only the username changed. Thus, our command has successfully executed.
- Change User ID:
sudo usermod -u 1002 username
- Change Home Directory:
sudo usermod -d /home/newhome username
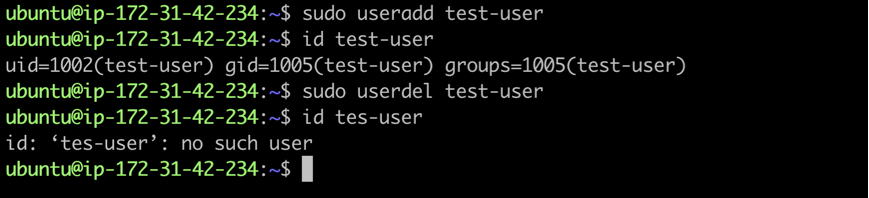
Deleting Users (
userdel):sudo userdel usernameDelete a user (
username) from the system.-roption removes the user's home directory and mail spool.
Creating a Group with
groupadd:To create a new group, use the
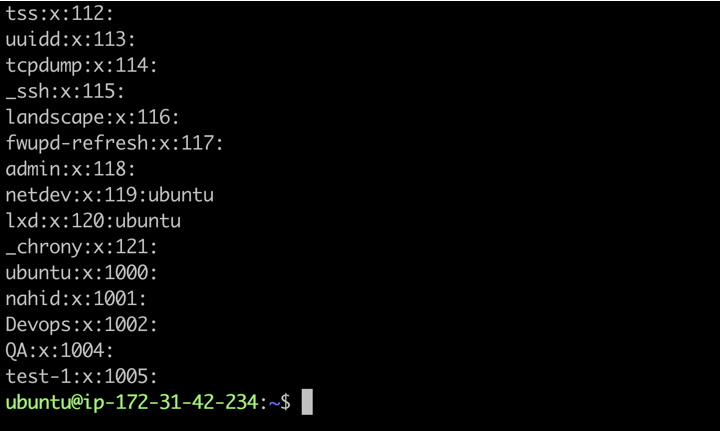
groupaddcommand. For example, to create a group named "Devops, Dev,QA" you would run:sudo groupadd Devops sudo groupadd Dev sudo groupadd QA
To view user group details, you can use the
getnet groupcommand. For example, to check the group list:getnet group

Modifying Groups (
groupmod):sudo groupmod [OPTIONS] groupnameModify attributes of an existing group (
groupname).Options can include changing the group name or group ID.
Now, we'll try to change the Dev group's name to Developer, so we need to execute the following command.
sudo groupmod -n new_groupname old_groupname
sudo groupmod -n Developer Dev


To confirm if the group name was modified, I executed the following commands. The group name changed from "Dev" to "Developer," and there's no longer any group named "Dev." Therefore, our command successfully executed the group name change.
Change Group ID (-g):
- Changes the group's GID (Group ID) to
new_gid.
sudo groupmod -g new_gid groupname
sudo groupmod -g 1002 groupname
Deleting a Group:
sudo groupdel groupnamesudo groupdel Developer
The group named "Developer" is not in the list of groups anymore, meaning the group has been successfully deleted.
Adding a User to a Group with
usermod:You can add a user to a specific group using the
usermodcommand. For instance, to add the user "john" to the "qa" group, run:sudo usermod -a -G groupname usernameThe
-aflag appends the user to the group without removing them from other groups.Let's add the "nahid" user to the "Devops" group using the following command:
sudo usermod -a -G Devops nahid

Before executing our command, let's first check the complete information of the "nahid" user using the "id nahid" command. After execution, we notice that the "nahid" user account is only added to the "nahid" group and isn't part of any other groups.
Now, after executing our command, we'll verify if it has worked correctly. So, we'll run the "id nahid" command again. Upon execution, we observe that the "nahid" user is now added to two groups: one is the default group named "nahid," created automatically during user creation, and the other is the "Devops" group, to which we appended the "nahid" user. Hence, our command has successfully executed.
Adding a User to Multiple Groups:
To add a user to multiple groups, you can list the groups separated by commas. For example, to add "niloy" to both the "Programmer", "Manager" and "QA" groups, run:
sudo usermod -a -G Programmer,Manager,QA niloy

Before executing our command, let's first check the complete information of the "niloy" user using the "id niloy" command. After execution, we notice that the "niloy" user account is only added to the "niloy" group and isn't part of any other groups.
To view user account or group details, you can use the id or getent command. For example, to check the groups that "niloy" belongs to:
getnet group | grep niloy
id niloy
Now, after executing our command, we'll verify if it has worked correctly. So, we'll run the "id niloy" command again. Upon execution, we observe that the "niloy" user is now added to Four groups: one is the default group named "niloy," created automatically during user creation, and the other three is the "Programmer", "Manager" and "QA" group, to which we appended the "niloy" user. Hence, our command has successfully executed.
- Viewing a Specific User's Default Group:
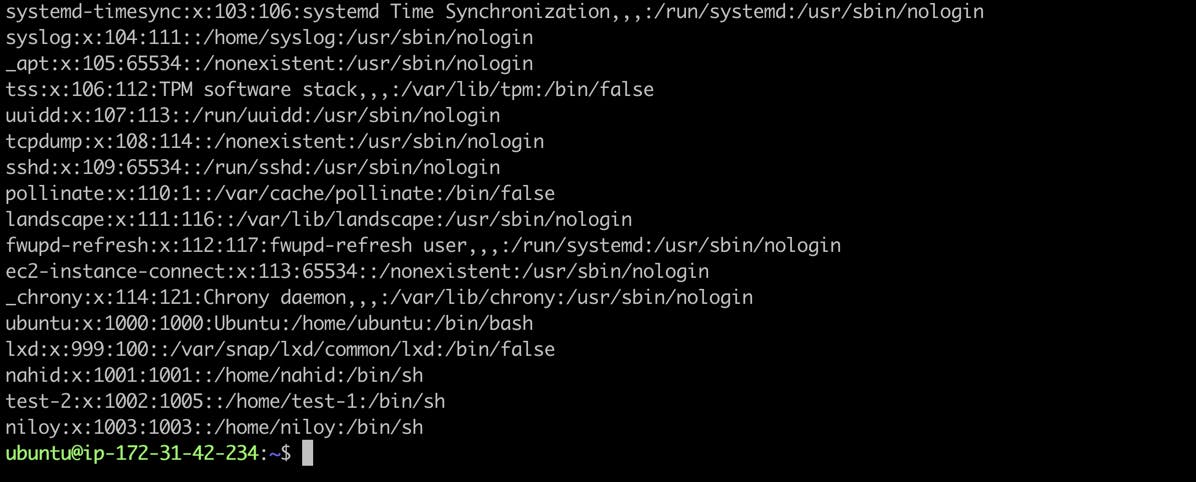
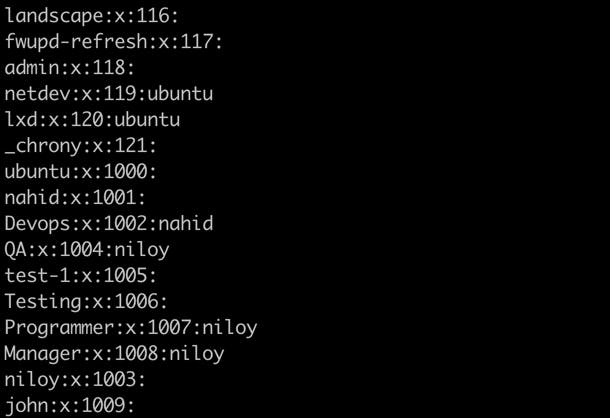
You can use a command like cat or less to view the content of the /etc/passwd file. Open a terminal and run one of the following commands:
cat /etc/passwd
#or
less /etc/passwd
- Remove a user from a specific group
To remove a user from a specific group in Linux, you can use the gpasswd command to modify group memberships. To remove the user "john" from the group "john," you can use the following command:
sudo gpasswd -d username groupname
Before executing the command, we checked and found that the "niloy" user account was added within the "Programmer" group.
id niloy

sudo gpasswd -d niloy Programmer
In this command:
gpasswdis the command to modify group passwords and memberships.-dspecifies that you want to remove a user from a group.The first "niloy" after
-dis the username you want to remove from the group.The second "Prograamer" is the name of the group from which you want to remove the user.
After running this command, the user "niloy" will be removed from the group "Prograamer"


After execution of our command, we noticed that there isn't any user named "niloy" in the "Programmer" group. Therefore, our command has been successfully executed.