Dockerizing and Deploying Three-Tier Full Stack Applications


Project Highlights:
Deployment Using Docker and Docker Compose: Successfully deployed multi-tier full-stack applications using Docker and Docker Compose. Managed containerized environments to ensure seamless integration and scalability of applications.
Custom Network and Volume Configuration: Implemented custom network creation and volume management to facilitate communication between containers and ensure data persistence across container lifecycles.
Backend and Frontend Deployment: Orchestrated the deployment of backend applications built on Node.js and frontend applications using React.js. Utilized Dockerfile to create Docker images and run containers efficiently.
MySQL Database Management: Managed MySQL databases within Docker containers, ensuring secure and efficient data storage. Implemented volume management to ensure data integrity and availability, even in the event of container failure.
Continuous Integration and Deployment (CI/CD): Integrated Docker-based deployment pipelines into CI/CD workflows, streamlining the software delivery process and enabling rapid iteration and deployment of applications.
Infrastructure as Code (IaC) Practices: Implemented Infrastructure as Code (IaC) practices using Dockerfiles and Docker Compose YAML files, enabling consistent and reproducible deployment of infrastructure components.
Networking and Service Dependencies: Configured custom networks and defined service dependencies within Docker Compose files to ensure seamless communication between microservices and optimal service orchestration.
Key Technologies:
Docker
Docker Compose
Node.js
React.js
MySQL
Continuous Integration/Continuous Deployment (CI/CD)
Infrastructure as Code (IaC)
Linux Environment
Git repo: https://github.com/nahidkishore/Three-Tier-Applications
To deploy our application, we will use two approaches.
Dockerfile: According to our project, Dockerfile will help me to create images and containers but the issue you will see is that I need to provide the network for each application to communicate with each other.
Docker-Compose: While doing deployment using Docker-Compose, it will create the default network in which the container will be created. So, you don’t need to configure the network manually. R emnite amara chaile custom network create o korte pari.
There are many more differences between Dockerfile & Docker-Compose. But today’s blog is dedicated to Project only. So, we won’t do that.
Deploy using Dockerfile
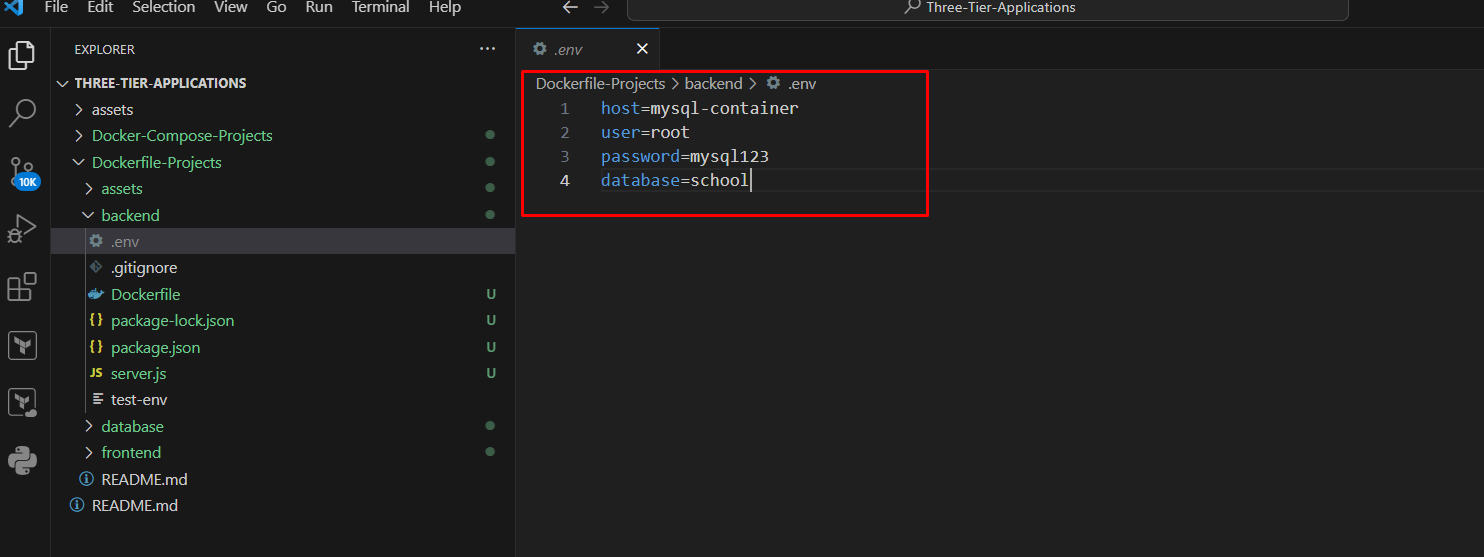
Open your backend folder, then create a .env file and add the provided code from the screenshot below.
In this code, I've used the MySQL container name as the host for establishing a connection between the backend and the database. You can modify the host name, but ensure it matches the MySQL container name, and do the same for other variables.
Now, let's deploy our three-tier full-stack applications on containers.
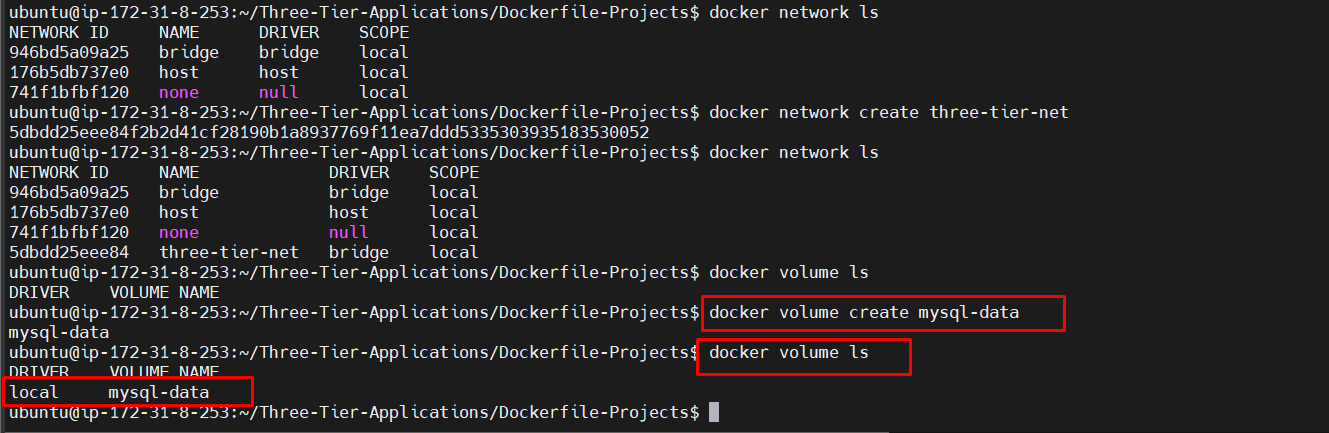
Firstly, we need to create a custom network for our three containers because all three containers need to access each other.
Create a network
Now, Our data is a crucial thing that needs to stay for a long. But if the container is stopped or fails then we will lose our all application data.
Create a volume
docker volume create mysql-data
We have completed our major prerequisites. So, let's create a Dockerfile for each of our applications. We are using React.js for the frontend, Node.js for the backend, and MySQL for the database in our three-tier applications.
Let's begin with the MySQL database, and here is our database Dockerfile.
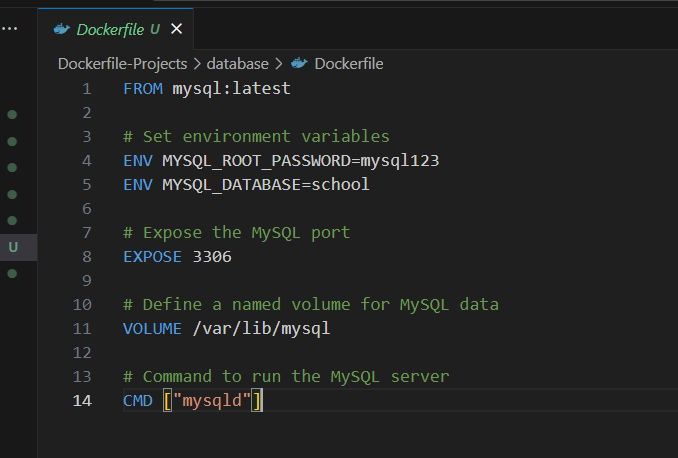
Explanation of database Dockerfile:
This Dockerfile utilizes the latest version of the official MySQL image available on Docker Hub.
Environmental variables are set to configure MySQL, including the root password (mysql123) and the name of the MySQL database (school).
Port 3306 is exposed to facilitate communication with the MySQL server (you can customize this as needed).
A named volume is defined at /var/lib/mysql to ensure persistent storage for MySQL data even if the container is stopped or removed.
The CMD instruction specifies the command to run when the container starts, initiating the MySQL server (mysqld).
Now, we will build the MySQL image and then run our container using the following command:
docker build . -t mysql-image
docker run -d -p 3306:3306 --name mysql-container --network=three-tier-net -v mysql-data:/var/lib/mysql mysql-image
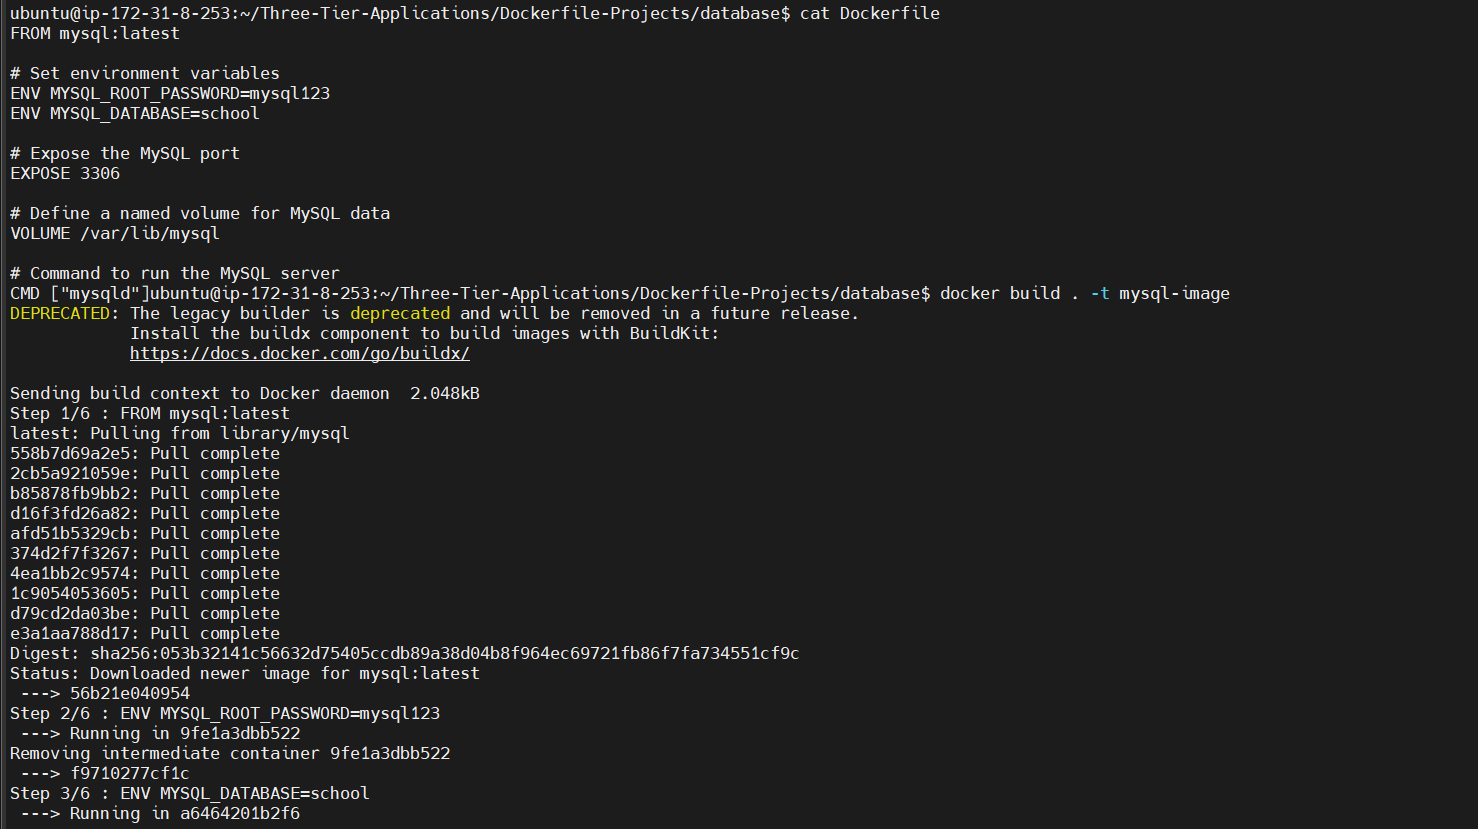
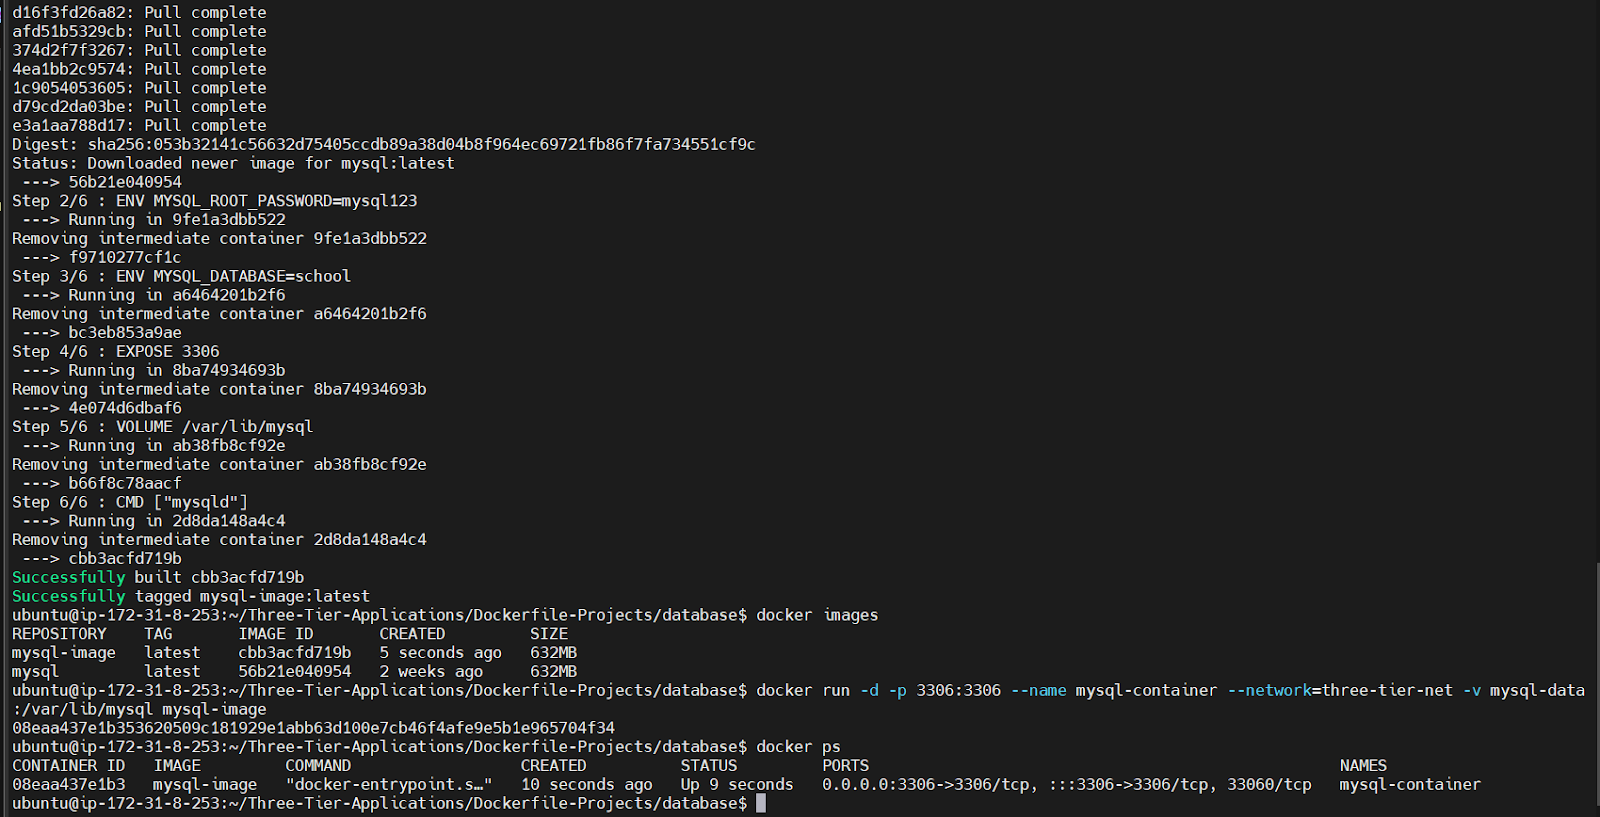
Wow!! Our MySQL image and container have been successfully set up.
Now, enter the MySQL docker container by executing the command below
docker exec -it <container_id/container_name> /bin/bash
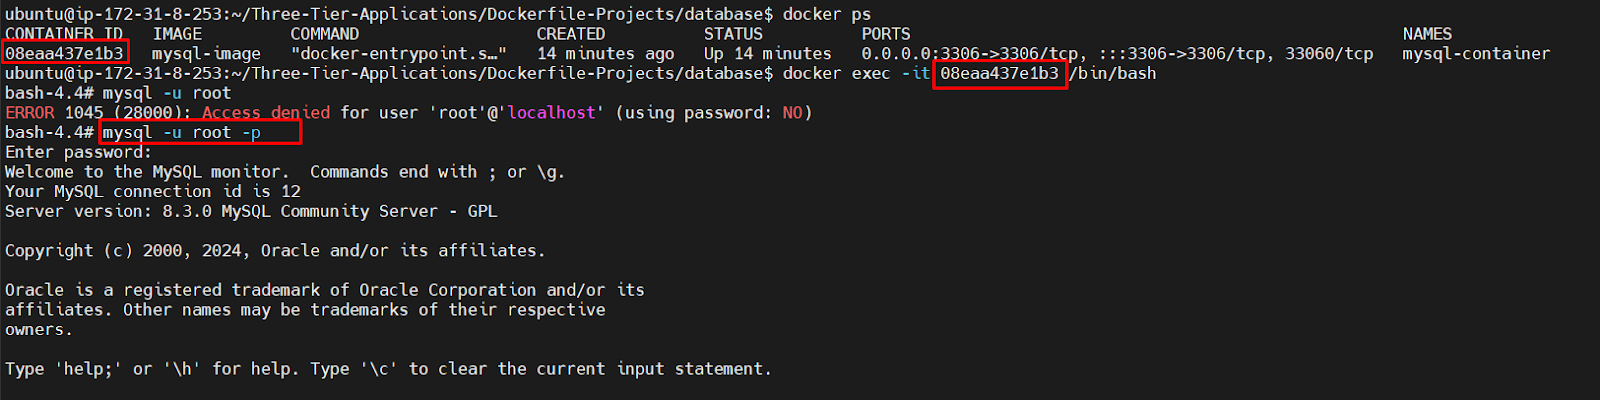
Now, we need to create two tables to store our data in the particular table. Use the below command.
USE school;
CREATE TABLE student (id INT AUTO_INCREMENT PRIMARY KEY, name varchar(40), roll_number int, class varchar(16));
CREATE TABLE teacher (id INT AUTO_INCREMENT PRIMARY KEY, name varchar(40), subject varchar(40), class varchar(16));
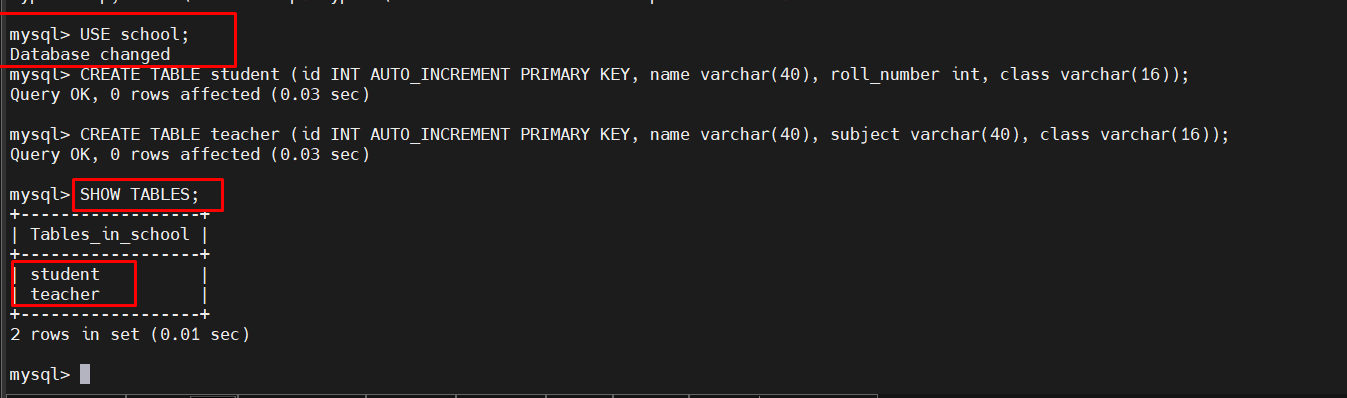
See, we have successfully created two tables in our database named "student" and "teacher."
So, our database is ready for connection with the backend.
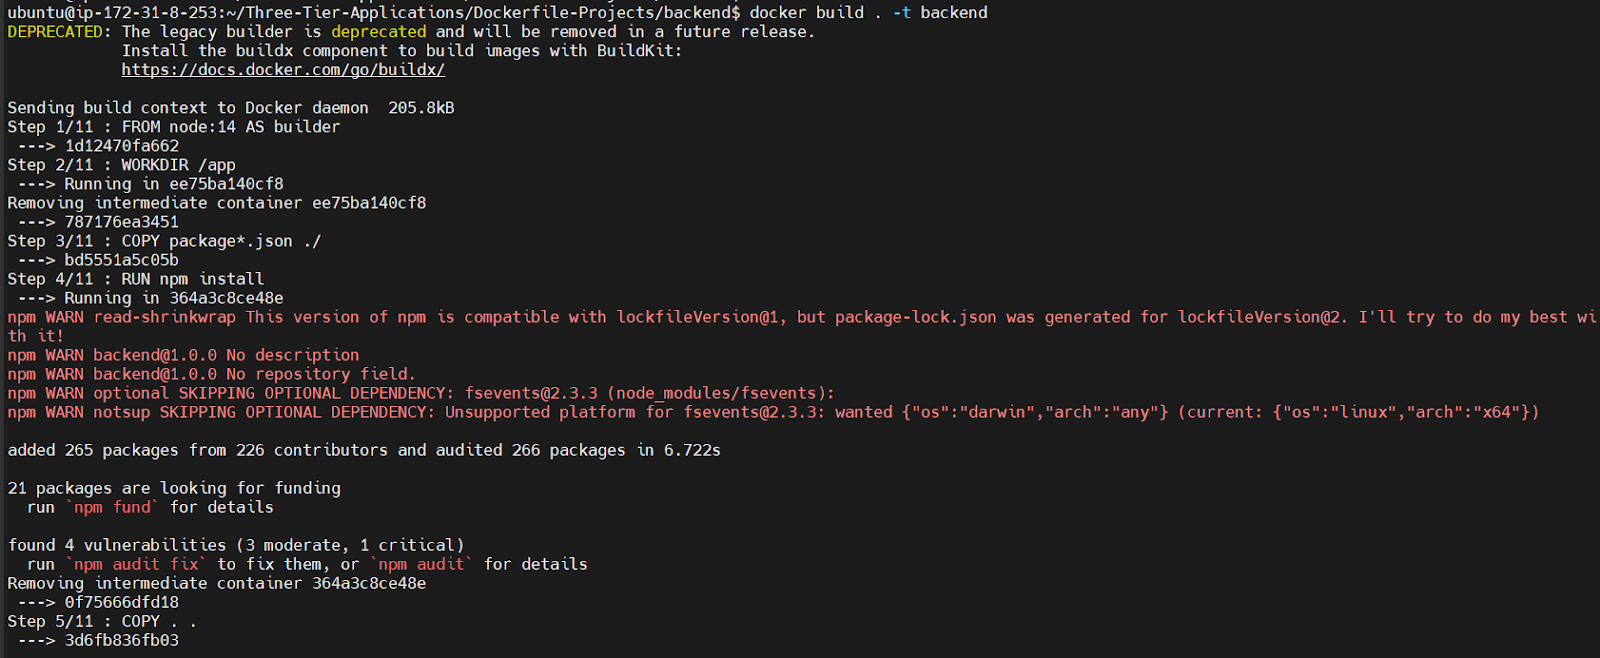
Now, let’s deploy our backend application on the docker container.
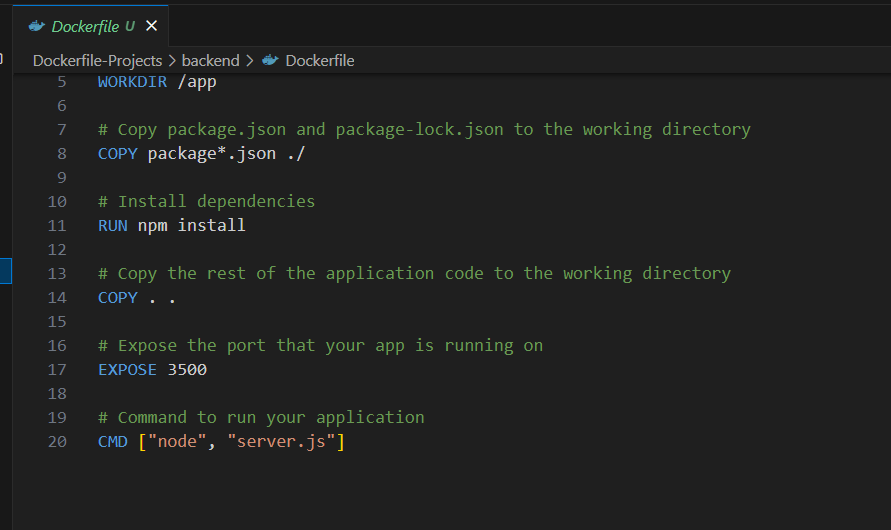
This is our backend Dockerfile. Now, let's build the Docker image and run our container using the following commands:
docker build . -t backend
docker run -d -p 3500:3500 - - name backend-container - -network=three-tier-net backend
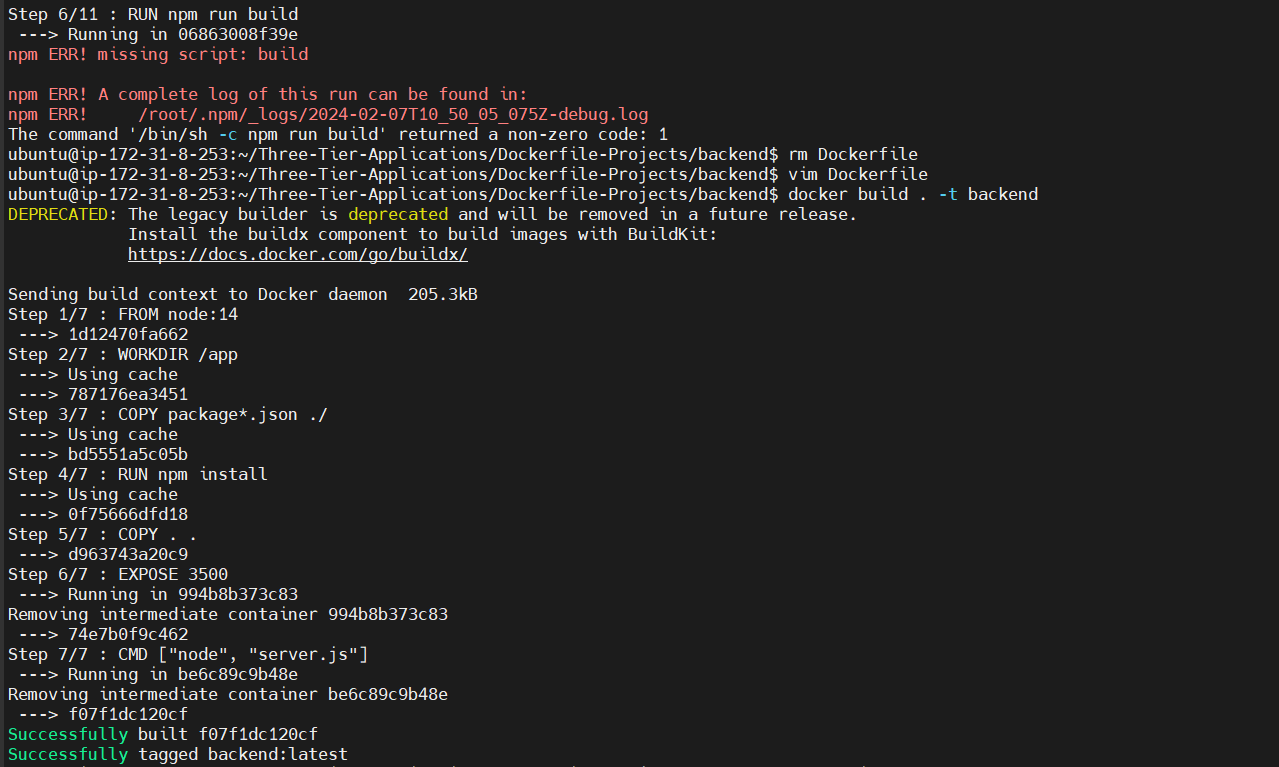
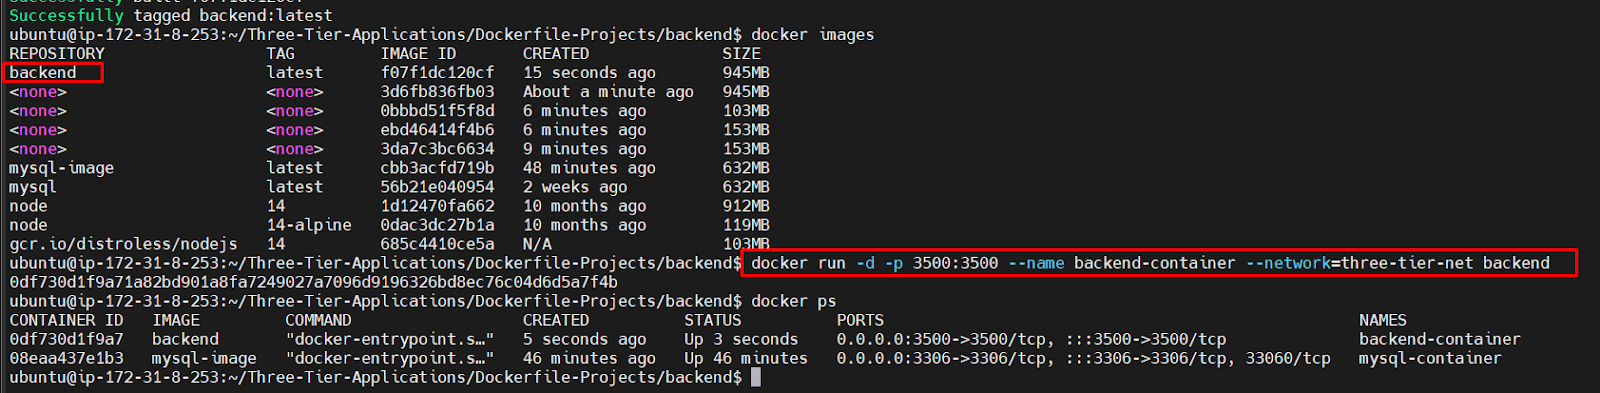
Let's verify if our backend application has successfully connected. To do this, we can check the Docker logs by entering the command "docker logs containerID" and hitting enter.
If everything is working, we should see the message "Listening on port 3500" from the backend application.

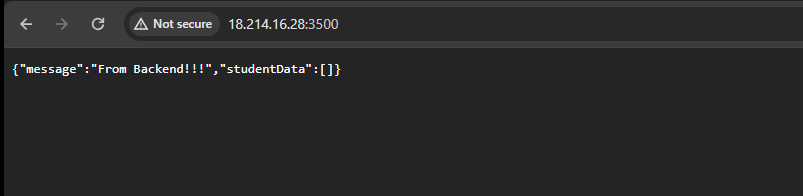
Another validation option is to test whether your backend application is functioning correctly. Simply enter the EC2 public IP address followed by ":3500" into your preferred browser. If the backend application responds as expected, then it is running fine.
Let’s deploy our frontend application on the docker container.
This is our frontend Dockerfile.

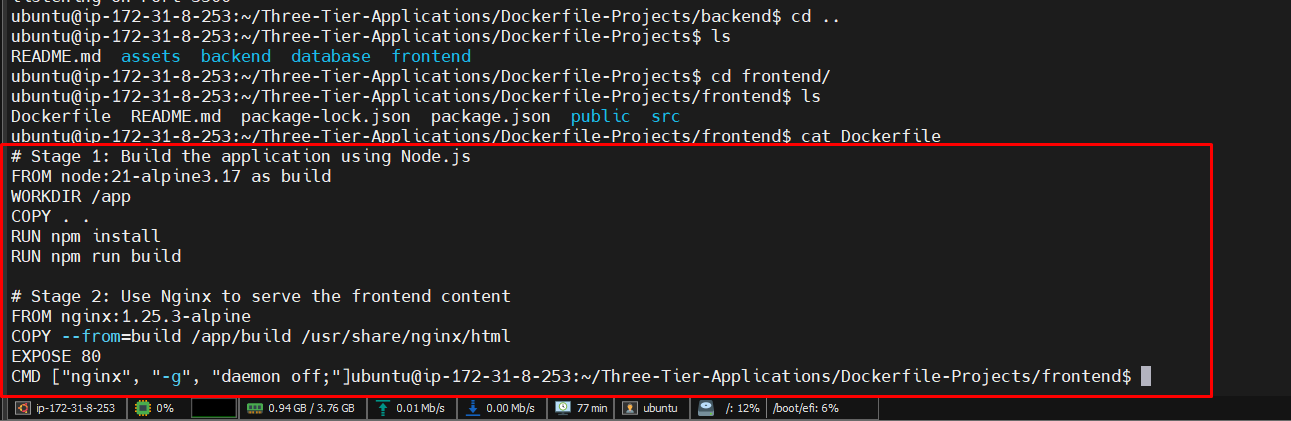
Explanation of frontend Dockerfile:
FROM node:21-alpine3.17 as build
This command will download the node image on the local machine and the entire execution will be built to use it in the next stage.
WORKDIR /app
It will set up our work directory which will be an /app.
COPY . .
This command will copy all the files that are present in the current directory to the /app directory.
RUN npm install
This command will install the dependencies that we have in the package files.
RUN npm run build
This command will create the build directory in which our content is present to host on the nginx server.
Here, our first stage is completed. Now, we have to shift our content to the /usr/share/nginx/html folder.
FROM nginx:1.25.3-alpine
This command will download the nginx image.
COPY — from=build /app/build /usr/share/nginx/html
This command will copy all the files that are present inside the build directory to /usr/share/nginx/html.
EXPOSE 80
This command will expose the port. So, we will be able to access the front end.
CMD [“nginx”, “-g”, “daemon off;”]
This command will run the nginx web server in the foreground and make sure to keep running in the foreground.
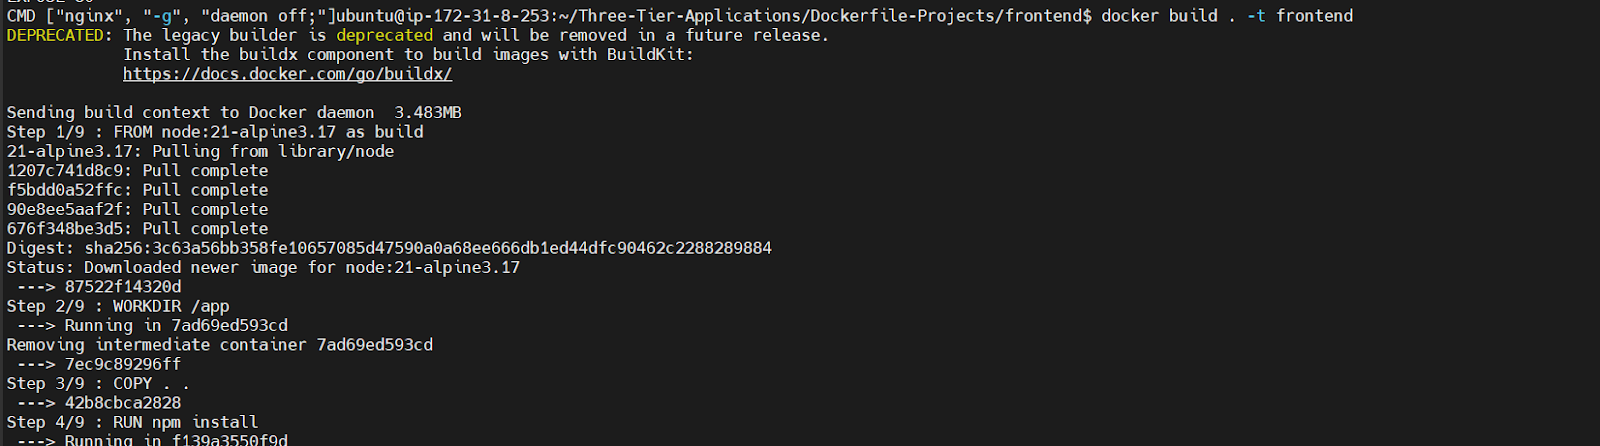
Now, let's build the Docker image and run our container using the following commands:
docker build . -t frontenddocker run -d -p 80:80 --name frontend-container --network=three-tier-net frontend
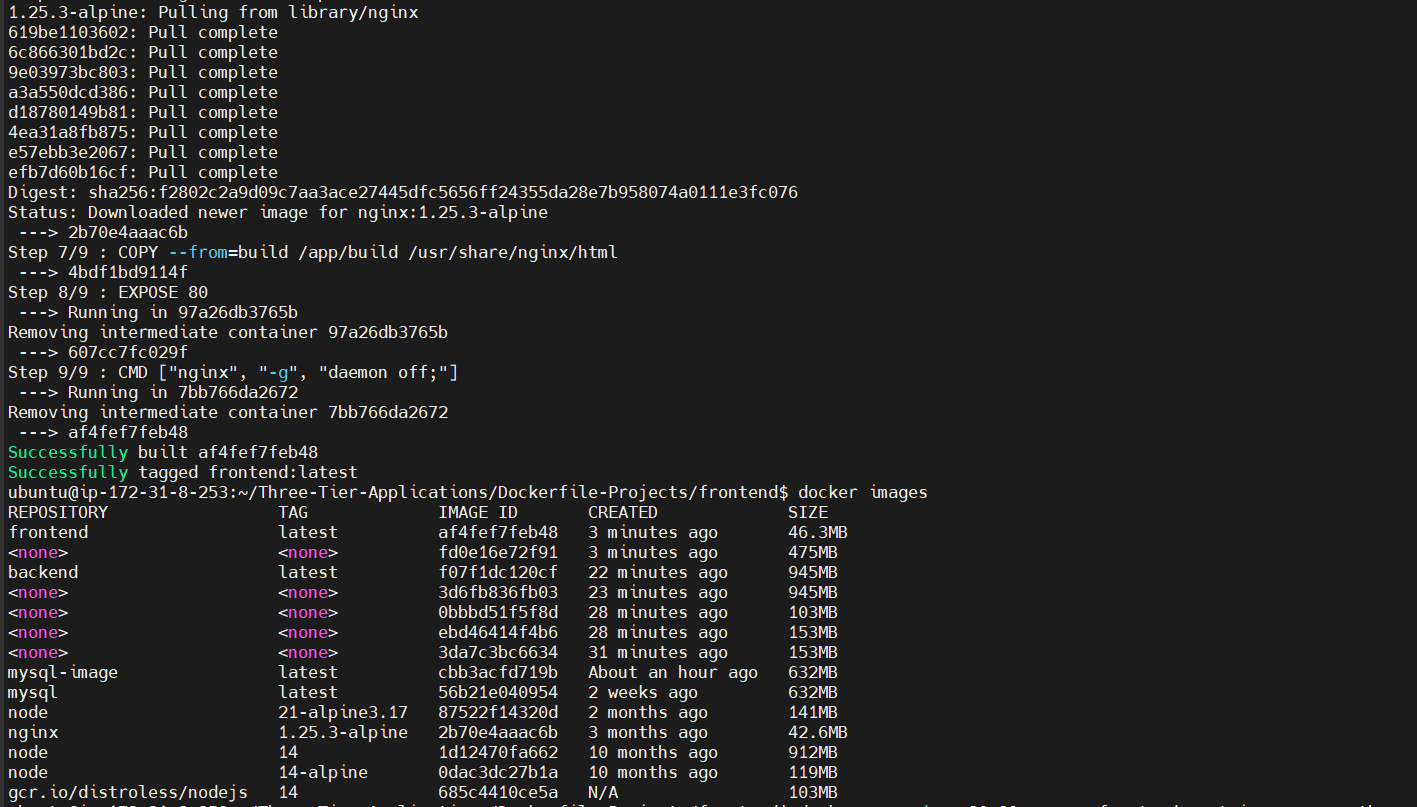
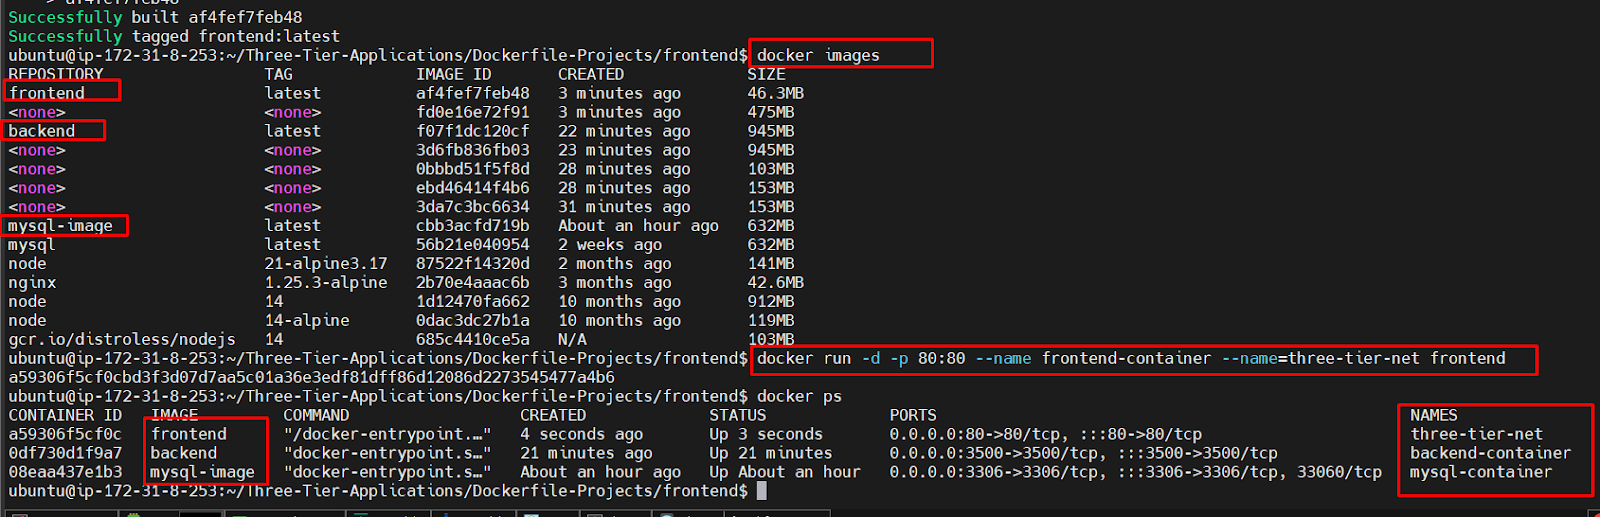
Done! Now, our application is running in three containers. We can access our application if desired.
If you access the EC2 instance's public IP URL at port 80, you'll witness the magic.
We've implemented a volume for the database container. Therefore, if the container is ever deleted, don't worry - the data will remain available and will be automatically transferred to the new Docker container. You just need to specify the same Docker volume.


Deploy using Docker-Compose file
Multi-Container Applications: Docker Compose is designed for managing multi-container applications. If your application involves multiple services (e.g., frontend, backend, database), Docker Compose helps orchestrate and manage them together.
Simplified Configuration: Docker Compose allows you to define your entire application stack, including services, networks, and volumes, in a single YAML file. This provides a more structured and readable way to manage configurations.
Easy Scaling: If you need to scale your application by running multiple instances of a service, Docker Compose simplifies the scaling process by allowing you to define the desired number of replicas.
Networks and Volumes: Docker Compose makes it easy to define and manage custom networks and volumes for your application.
Environment Variables: You can set environment variables in Docker Compose files, making it easier to manage configurations across different environments.
Service Dependencies: You can express dependencies between services and ensure that services are started in the correct order.
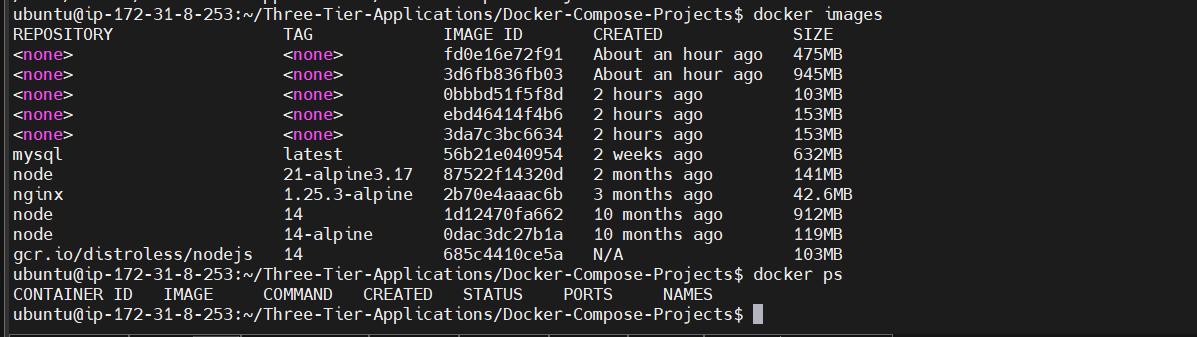
Before going to do the demo for docker-compose, make sure that all three docker images and containers are deleted.
In docker-compose, you don’t need to create a network or volume manually. docker-compose will take care of those things. Or if you want to add custom docker network you can can easily add it.
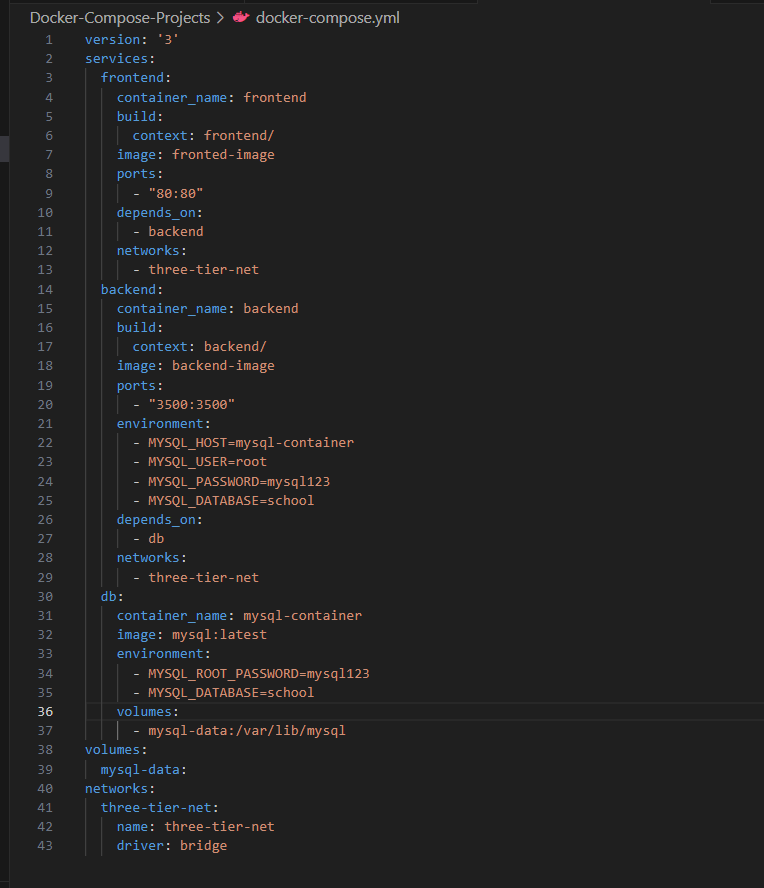
The Dockerfile for frontend and backend will remain the same. You can see the file structure and docker-compose.yml file in below screenshot and keep it as it is.
Explanation:
version: '3': Specifies the Docker Compose file version.
services: Describes the containers/services in the application.
frontend: Represents the frontend application.
container_name: Specifies the name of the container.
build: Indicates the build context for the frontend.
image: Specifies the image name for the frontend.
ports: Maps the host's port 80 to the container's port 80.
depends_on: Declares a dependency on the backend service.
networks: Connects to the three-tier network.
backend: Represents the backend application.
Similar structure to frontend with additional environment variables for MySQL connection.
Depends on the db service.
db: Represents the MySQL database service.
Uses the official MySQL image.
Defines environment variables for MySQL configuration.
Utilizes a named volume (mysql-data) for persistent data storage.
volumes: Defines the named volume 'mysql-data' for MySQL data persistence.
networks: Defines the 'three-tier-net' bridge network for communication between services.
Let’s try to deploy our application using docker-compose
There is one prerequisite for docker-compose docker-compose must be installed on your machine. If not, then use the below command to install it.
sudo apt install docker-compose -y
After installing the docker-compose, run the docker-compose file to deploy your application.
docker-compose up -d
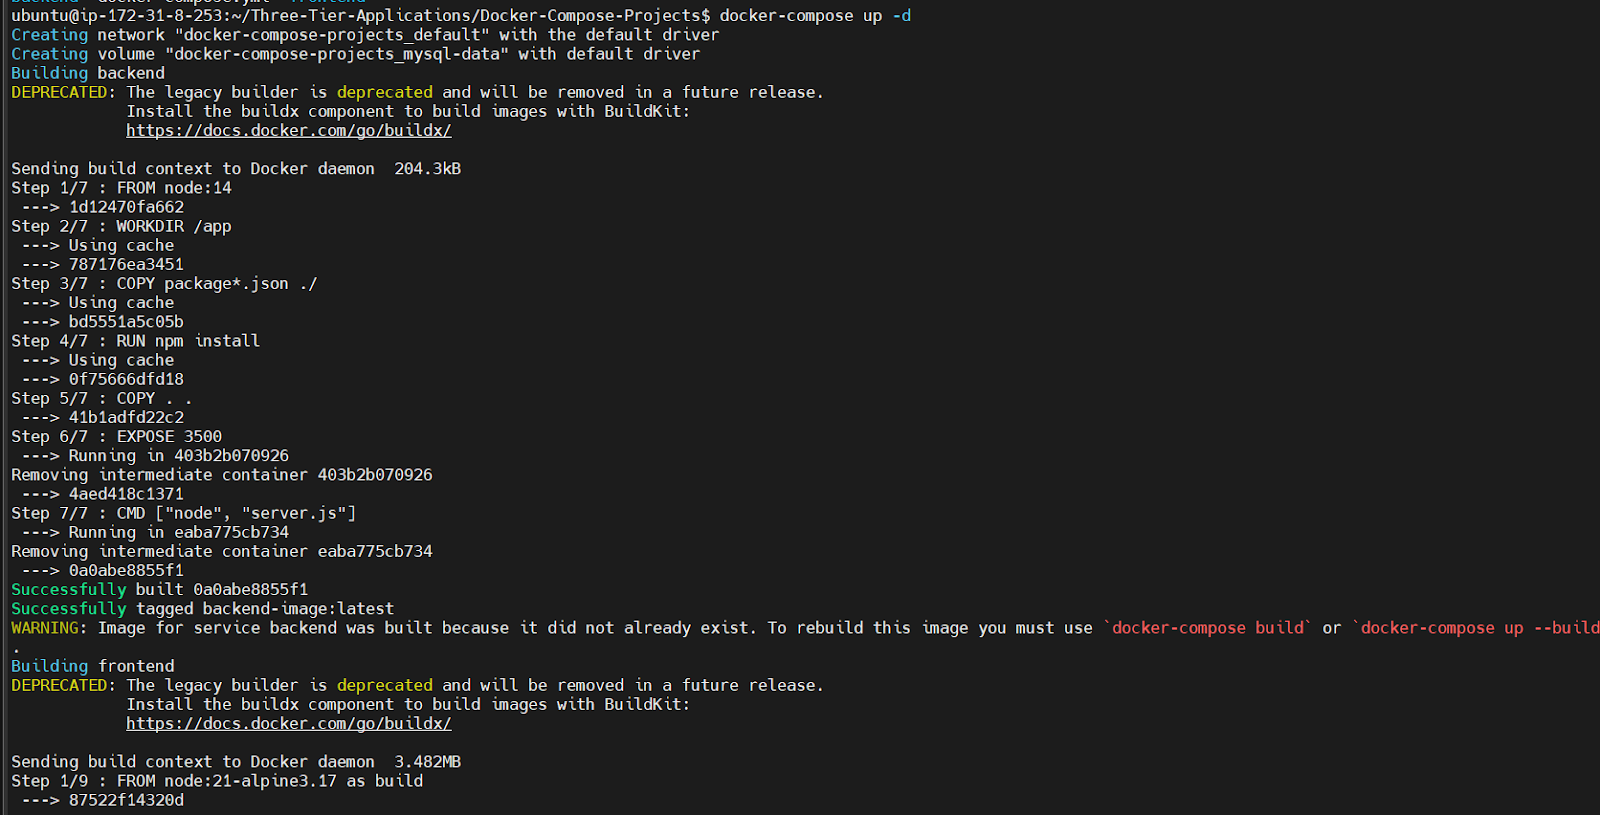
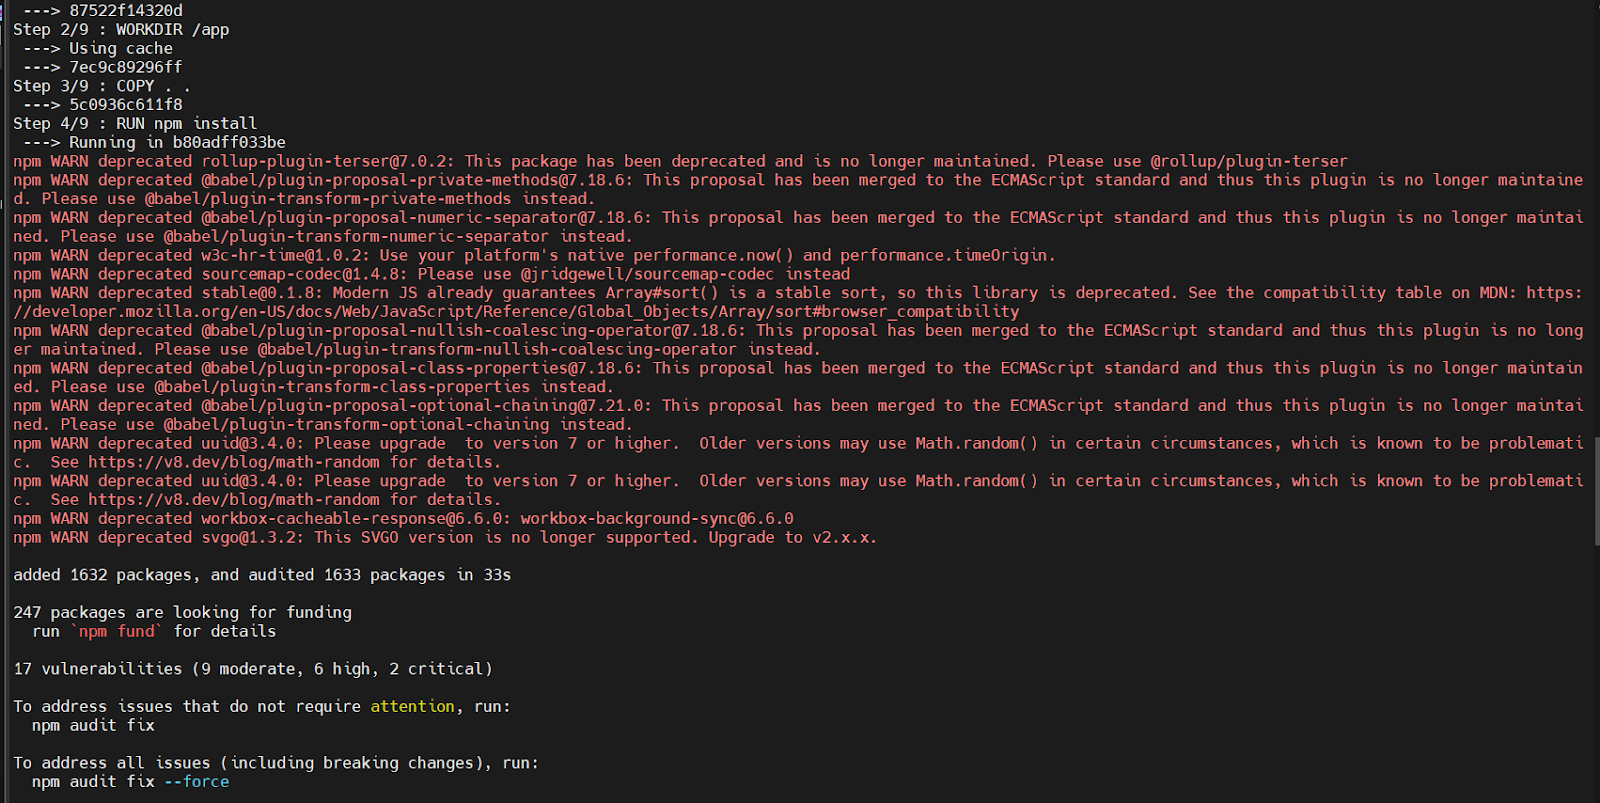
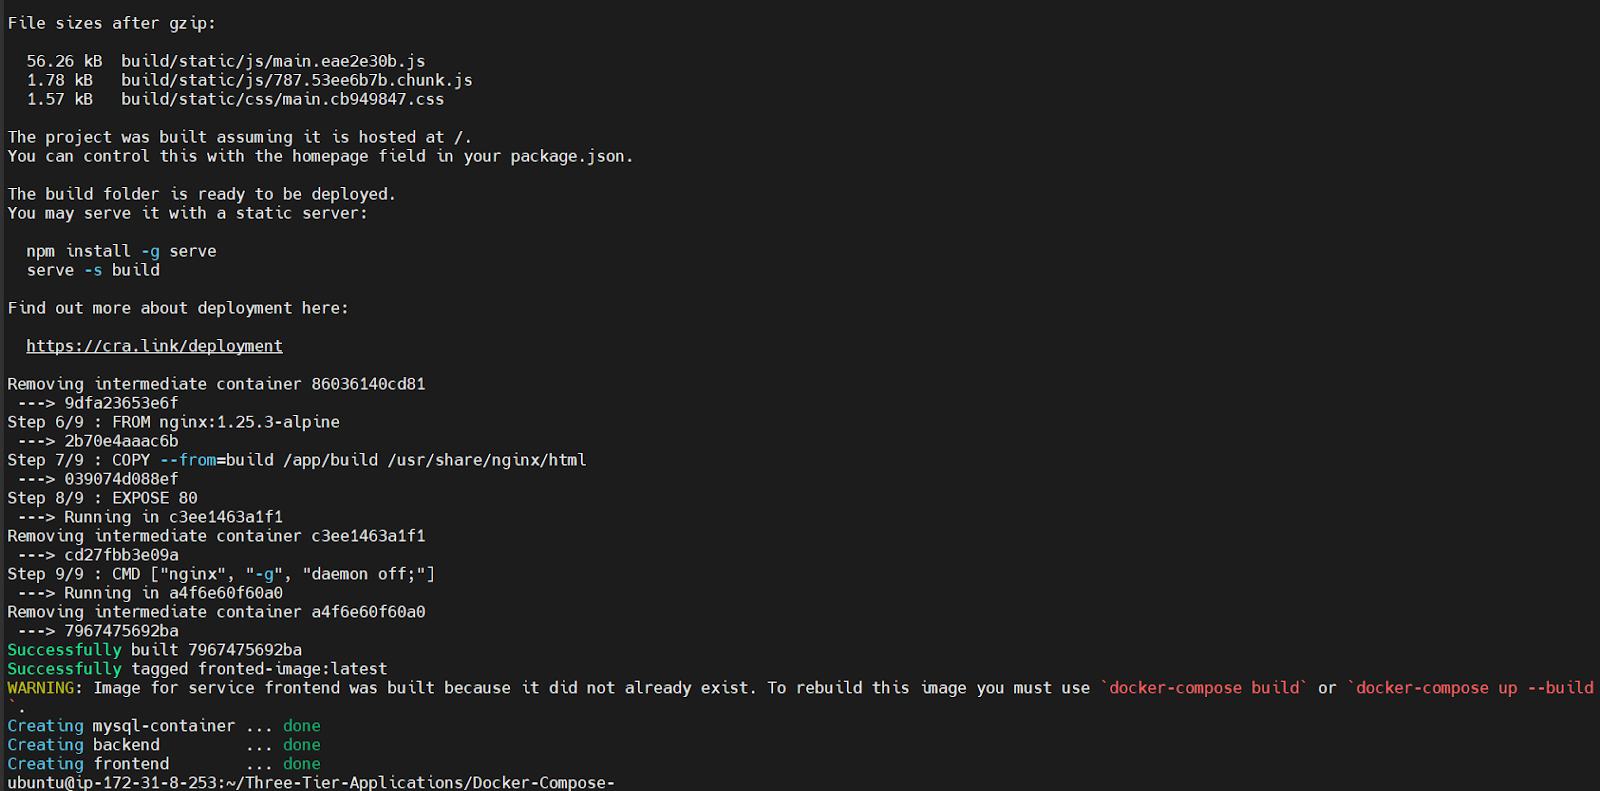
We have successfully build all Docker images and are now running multiple containers simultaneously.
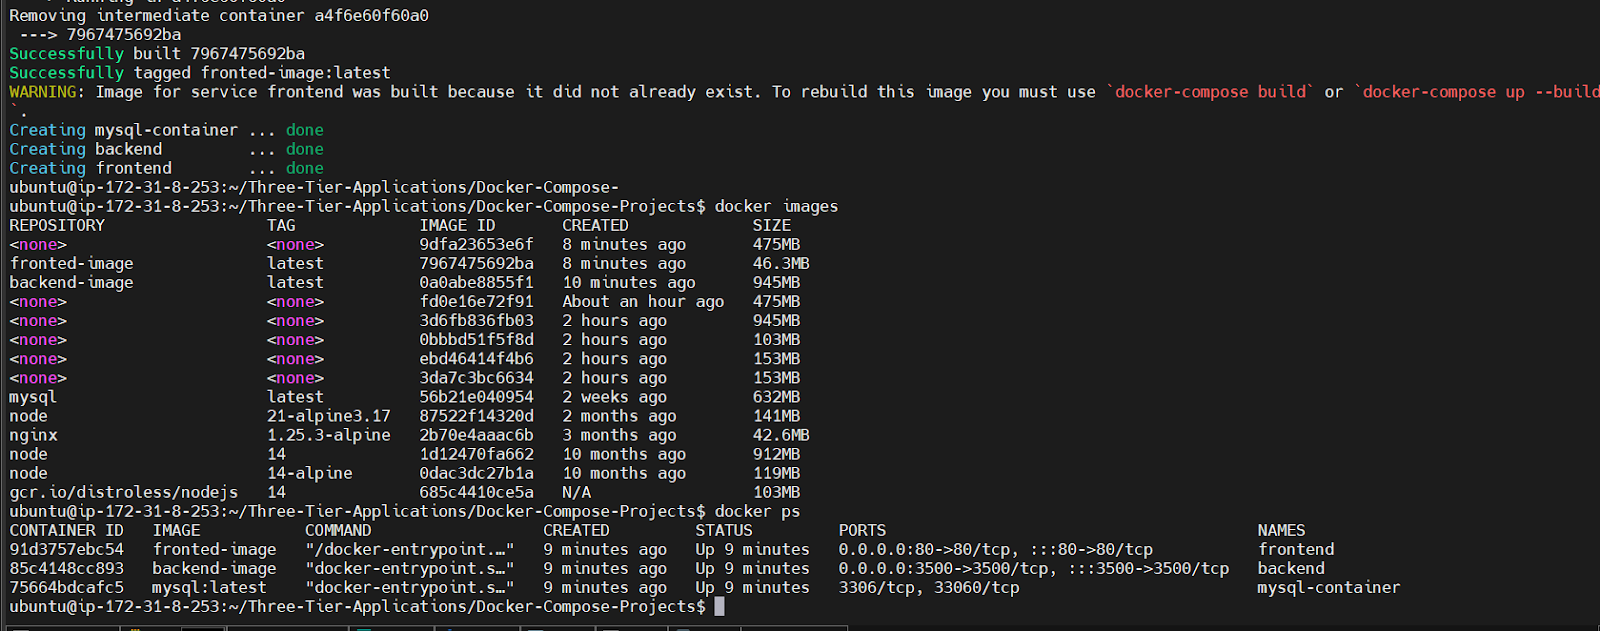

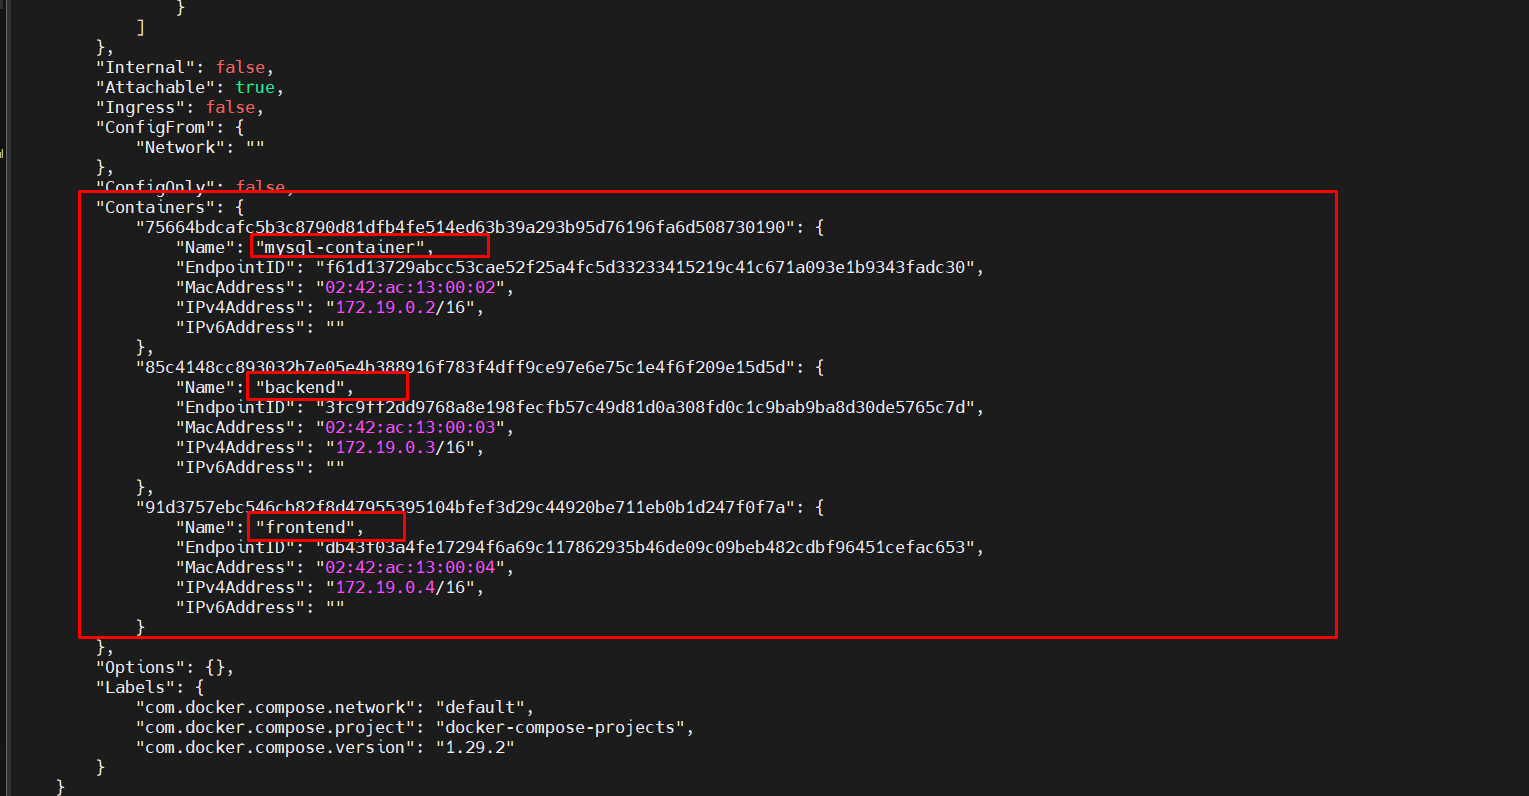
See, in our three containers, they can access each other within the same network.
Copy the IP address of your EC2 instance, paste it into your preferred browser, and enjoy the application.

Conclusions:
Successfully deployed and managed multiple Dockerized applications, optimizing performance and resource utilization.
Implemented robust data management strategies, ensuring data integrity and availability in containerized environments.
Streamlined deployment workflows through the integration of Docker-based CI/CD pipelines, improving software delivery efficiency and reliability.